{% for news in news_articles %}
 {% endfor %}
 }}) ```
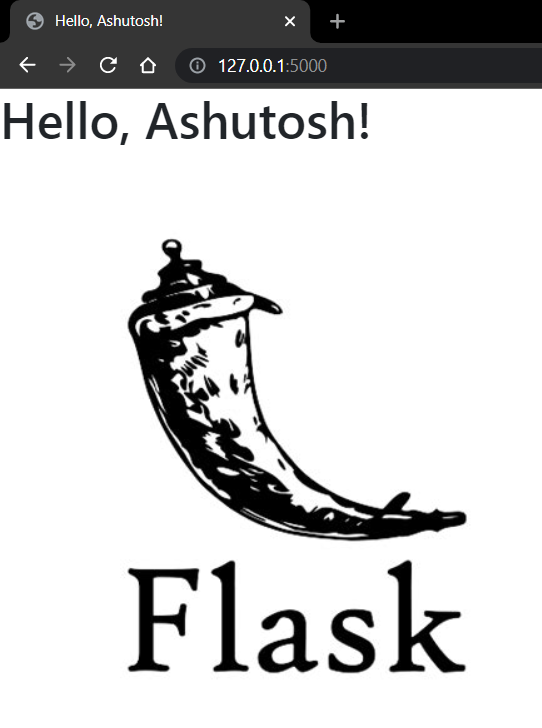
Flask provides a `url_for` function that generates URLs dynamically. We are referencing the `images/demo.jpg` file inside the `static` folder. Let's put this line below the *Hello* message. Here's what our output will look like:
## News API
Now, let us jump to the main part of the application - how we will get the news headlines. For this purpose, we are going to use [News API](https://newsapi.org). Signup for a free account and get an **API Key** from News API. Once you get the API Key, create a `.env` file at the top-level directory and store your API Key there as:
```
NEWS_API_KEY=YOUR-API-KEY-HERE
```
You can learn more about environment variables [here](https://iread.ga/posts/49/do-you-really-need-environment-variables-in-python). To use environment variables, we are using an external library called `python-decouple`. You can install it as:
```bash
$ pip install python-decouple
```
Once installed, create a `utils.py` file inside the `core` package. Inside this file, we're going to fetch the latest news headlines. News API has a Python library called [newsapi-python](https://pypi.org/project/newsapi-python/). But instead of using that, we will be using the `requests` library. You need to install it as:
```bash
$ pip install requests
```
You can learn how to work with APIs using Python in [this blog](https://iread.ga/posts/26/python-api-tutorial).
Now, that we have everything ready, let us fetch the latest news headlines in the `utils.py` file. Open the `utils.py` file and add the following code there:
```py
import requests
from decouple import config
NEWS_API_KEY = config('NEWS_API_KEY')
COUNTRY = 'in'
def get_latest_news():
news_data = requests.get(f'https://newsapi.org/v2/top-headlines?country={COUNTRY}&apiKey={NEWS_API_KEY}').json()
return news_data['articles']
```
In the above script, we are having two imports - `requests` to get the news and `config` to get values of environment variables stored in `.env` file. We are then storing the value of **API Key** inside a variable `NEWS_API_KEY`. We are also setting the `COUNTRY` to **in** , i.e., India. You can find the country code of various countries in the News API documentation. The next thing we are doing is creating a `get_latest_news()` function. Inside that, we are making a **GET** request to the URL provided by News API [here](https://newsapi.org/docs/endpoints/top-headlines) with the country and API Key parameters. We are converting the response into JSON. It will look something like this:
```json
{
"status": "ok",
"totalResults": 38,
"articles": [
{
"source": {
"id": null,
"name": "Sportskeeda"
},
"author": "Aniket Thakkar",
"title": "Latest Free Fire redeem code to get Weapon loot crate today (14 October 2021) - Sportskeeda",
"description": "Gun crates are one of the ways that players in Free Fire can obtain impressive and appealing gun skins.",
"url": "https://www.sportskeeda.com/free-fire/latest-free-fire-redeem-code-get-weapon-loot-crate-today-14-october-2021",
"urlToImage": "https://staticg.sportskeeda.com/editor/2021/10/d0b83-16341799119781-1920.jpg",
"publishedAt": "2021-10-14T03:51:50Z",
"content": null
},
{
"source": {
"id": null,
"name": "NDTV News"
},
"author": null,
"title": "BSF Gets Increased Powers In 3 Border States: What It Means - NDTV",
"description": "Border Security Force (BSF) officers will now have the power toarrest, search, and of seizure to the extent of 50 km inside three newstates sharing international boundaries with Pakistan and Bangladesh.",
"url": "https://www.ndtv.com/india-news/bsf-gets-increased-powers-in-3-border-states-what-it-means-2574644",
"urlToImage": "https://c.ndtvimg.com/2021-08/eglno7qk_-bsf-recruitment-2021_625x300_10_August_21.jpg",
"publishedAt": "2021-10-14T03:44:00Z",
"content": "This move is quickly snowballing into a debate on state autonomy. New Delhi: Border Security Force (BSF) officers will now have the power to arrest, search, and of seizure to the extent of 50 km ins… [+4143 chars]"
},
{
"source": {
"id": "the-times-of-india",
"name": "The Times of India"
},
"author": "TIMESOFINDIA.COM",
"title": "5 health conditions that can make your joints hurt - Times of India",
"description": "Joint pain caused by these everyday issues generally goes away on its own when you stretch yourself a little and flex your muscles.",
"url": "https://timesofindia.indiatimes.com/life-style/health-fitness/health-news/5-health-conditions-that-can-make-your-joints-hurt/photostory/86994969.cms",
"urlToImage": "https://static.toiimg.com/photo/86995017.cms",
"publishedAt": "2021-10-14T03:30:00Z",
"content": "Depression is a mental health condition, but the symptoms may manifest even on your physical health. Unexpected aches and pain in the joints that you may experience when suffering from chronic depres… [+373 chars]"
},
{
"source": {
"id": null,
"name": "The Indian Express"
},
"author": "Devendra Pandey",
"title": "Rahul Dravid likely to be interim coach for New Zealand series - The Indian Express",
"description": "It’s learnt that a few Australian coaches expressed interest in the job, but the BCCI isn’t keen as they are focussing on an Indian for the role, before they look elsewhere.",
"url": "https://indianexpress.com/article/sports/cricket/rahul-dravid-likely-to-be-interim-coach-for-new-zealand-series-7570990/",
"urlToImage": "https://images.indianexpress.com/2021/05/rahul-dravid.jpg",
"publishedAt": "2021-10-14T03:26:09Z",
"content": "Rahul Dravid is likely to be approached by the Indian cricket board to be the interim coach for Indias home series against New Zealand. Head coach Ravi Shastri and the core of the support staff will … [+1972 chars]"
},
{
"source": {
"id": null,
"name": "CNBCTV18"
},
"author": null,
"title": "Thursday's top brokerage calls: Infosys, Wipro and more - CNBCTV18",
"description": "Goldman Sachs has maintained its 'sell' rating on Mindtree largely due to expensive valuations, while UBS expects a muted reaction from Wipro's stock. Here are the top brokerage calls for the day:",
"url": "https://www.cnbctv18.com/market/stocks/thursdays-top-brokerage-calls-infosys-wipro-and-more-11101072.htm",
"urlToImage": "https://images.cnbctv18.com/wp-content/uploads/2019/03/buy-sell.jpg",
"publishedAt": "2021-10-14T03:26:03Z",
"content": "MiniGoldman Sachs has maintained its 'sell' rating on Mindtree largely due to expensive valuations, while UBS expects a muted reaction from Wipro's stock. Here are the top brokerage calls for the day:"
}
]
}
```
Since the news is contained in a list called `articles`, we are returning `news_data['articles']` from the function. Now we are ready to use this function in our routes.
## Designing News Page
We're going to design the news page using Bootstrap only. So, create a `news.html` file inside the `templates` directory and add the following code there:
```html
```
Flask provides a `url_for` function that generates URLs dynamically. We are referencing the `images/demo.jpg` file inside the `static` folder. Let's put this line below the *Hello* message. Here's what our output will look like:

## News API
Now, let us jump to the main part of the application - how we will get the news headlines. For this purpose, we are going to use [News API](https://newsapi.org). Signup for a free account and get an **API Key** from News API. Once you get the API Key, create a `.env` file at the top-level directory and store your API Key there as:
```
NEWS_API_KEY=YOUR-API-KEY-HERE
```
You can learn more about environment variables [here](https://iread.ga/posts/49/do-you-really-need-environment-variables-in-python). To use environment variables, we are using an external library called `python-decouple`. You can install it as:
```bash
$ pip install python-decouple
```
Once installed, create a `utils.py` file inside the `core` package. Inside this file, we're going to fetch the latest news headlines. News API has a Python library called [newsapi-python](https://pypi.org/project/newsapi-python/). But instead of using that, we will be using the `requests` library. You need to install it as:
```bash
$ pip install requests
```
You can learn how to work with APIs using Python in [this blog](https://iread.ga/posts/26/python-api-tutorial).
Now, that we have everything ready, let us fetch the latest news headlines in the `utils.py` file. Open the `utils.py` file and add the following code there:
```py
import requests
from decouple import config
NEWS_API_KEY = config('NEWS_API_KEY')
COUNTRY = 'in'
def get_latest_news():
news_data = requests.get(f'https://newsapi.org/v2/top-headlines?country={COUNTRY}&apiKey={NEWS_API_KEY}').json()
return news_data['articles']
```
In the above script, we are having two imports - `requests` to get the news and `config` to get values of environment variables stored in `.env` file. We are then storing the value of **API Key** inside a variable `NEWS_API_KEY`. We are also setting the `COUNTRY` to **in** , i.e., India. You can find the country code of various countries in the News API documentation. The next thing we are doing is creating a `get_latest_news()` function. Inside that, we are making a **GET** request to the URL provided by News API [here](https://newsapi.org/docs/endpoints/top-headlines) with the country and API Key parameters. We are converting the response into JSON. It will look something like this:
```json
{
"status": "ok",
"totalResults": 38,
"articles": [
{
"source": {
"id": null,
"name": "Sportskeeda"
},
"author": "Aniket Thakkar",
"title": "Latest Free Fire redeem code to get Weapon loot crate today (14 October 2021) - Sportskeeda",
"description": "Gun crates are one of the ways that players in Free Fire can obtain impressive and appealing gun skins.",
"url": "https://www.sportskeeda.com/free-fire/latest-free-fire-redeem-code-get-weapon-loot-crate-today-14-october-2021",
"urlToImage": "https://staticg.sportskeeda.com/editor/2021/10/d0b83-16341799119781-1920.jpg",
"publishedAt": "2021-10-14T03:51:50Z",
"content": null
},
{
"source": {
"id": null,
"name": "NDTV News"
},
"author": null,
"title": "BSF Gets Increased Powers In 3 Border States: What It Means - NDTV",
"description": "Border Security Force (BSF) officers will now have the power toarrest, search, and of seizure to the extent of 50 km inside three newstates sharing international boundaries with Pakistan and Bangladesh.",
"url": "https://www.ndtv.com/india-news/bsf-gets-increased-powers-in-3-border-states-what-it-means-2574644",
"urlToImage": "https://c.ndtvimg.com/2021-08/eglno7qk_-bsf-recruitment-2021_625x300_10_August_21.jpg",
"publishedAt": "2021-10-14T03:44:00Z",
"content": "This move is quickly snowballing into a debate on state autonomy. New Delhi: Border Security Force (BSF) officers will now have the power to arrest, search, and of seizure to the extent of 50 km ins… [+4143 chars]"
},
{
"source": {
"id": "the-times-of-india",
"name": "The Times of India"
},
"author": "TIMESOFINDIA.COM",
"title": "5 health conditions that can make your joints hurt - Times of India",
"description": "Joint pain caused by these everyday issues generally goes away on its own when you stretch yourself a little and flex your muscles.",
"url": "https://timesofindia.indiatimes.com/life-style/health-fitness/health-news/5-health-conditions-that-can-make-your-joints-hurt/photostory/86994969.cms",
"urlToImage": "https://static.toiimg.com/photo/86995017.cms",
"publishedAt": "2021-10-14T03:30:00Z",
"content": "Depression is a mental health condition, but the symptoms may manifest even on your physical health. Unexpected aches and pain in the joints that you may experience when suffering from chronic depres… [+373 chars]"
},
{
"source": {
"id": null,
"name": "The Indian Express"
},
"author": "Devendra Pandey",
"title": "Rahul Dravid likely to be interim coach for New Zealand series - The Indian Express",
"description": "It’s learnt that a few Australian coaches expressed interest in the job, but the BCCI isn’t keen as they are focussing on an Indian for the role, before they look elsewhere.",
"url": "https://indianexpress.com/article/sports/cricket/rahul-dravid-likely-to-be-interim-coach-for-new-zealand-series-7570990/",
"urlToImage": "https://images.indianexpress.com/2021/05/rahul-dravid.jpg",
"publishedAt": "2021-10-14T03:26:09Z",
"content": "Rahul Dravid is likely to be approached by the Indian cricket board to be the interim coach for Indias home series against New Zealand. Head coach Ravi Shastri and the core of the support staff will … [+1972 chars]"
},
{
"source": {
"id": null,
"name": "CNBCTV18"
},
"author": null,
"title": "Thursday's top brokerage calls: Infosys, Wipro and more - CNBCTV18",
"description": "Goldman Sachs has maintained its 'sell' rating on Mindtree largely due to expensive valuations, while UBS expects a muted reaction from Wipro's stock. Here are the top brokerage calls for the day:",
"url": "https://www.cnbctv18.com/market/stocks/thursdays-top-brokerage-calls-infosys-wipro-and-more-11101072.htm",
"urlToImage": "https://images.cnbctv18.com/wp-content/uploads/2019/03/buy-sell.jpg",
"publishedAt": "2021-10-14T03:26:03Z",
"content": "MiniGoldman Sachs has maintained its 'sell' rating on Mindtree largely due to expensive valuations, while UBS expects a muted reaction from Wipro's stock. Here are the top brokerage calls for the day:"
}
]
}
```
Since the news is contained in a list called `articles`, we are returning `news_data['articles']` from the function. Now we are ready to use this function in our routes.
## Designing News Page
We're going to design the news page using Bootstrap only. So, create a `news.html` file inside the `templates` directory and add the following code there:
```html