How to Set Up Magic Link Authentication with React, Flask, and Authsignal
Authentication is the process of verifying the identity of a user or system. It ensures that only authorized individuals or systems can access certain resources or perform specific actions.
Magic Link Authentication offers a simple yet secure way for users to log in without passwords. This tutorial will walk you through the implementation of Magic Link Authentication using React for the front end, Flask for the back end, and the authentication service provided by Authsignal.
Understanding Magic Link Authentication
Magic link authentication is a convenient and secure authentication method that simplifies users' login process. Instead of entering a username and password, users receive a unique link via email. This link, known as a magic link, grants them access to their account without traditional credentials.
One key difference between magic link authentication and authentication with email verification is the user experience. With magic link authentication, users can authenticate with just a single click. They don't need to remember or enter a password, which can be especially beneficial for users who struggle with password management or find it inconvenient to type in their credentials repeatedly.
While email verification adds an extra layer of security, it may require the user to remember additional credentials or go through multiple steps before accessing their account. If you're interested in learning more about email verification, you can check out my article here to dive deeper into the topic.
How to Configure Authsignal
Authsignal is a service that makes implementing modern authentication methods (like Magic Links and Passkeys) easier. It provides simple tools to integrate secure login methods into your web apps without hassle.
Before proceeding with the tutorial, you need to create an Authsignal account. To do that, you can follow these steps:
First, go to authsignal.com and click on "Create Free Account".
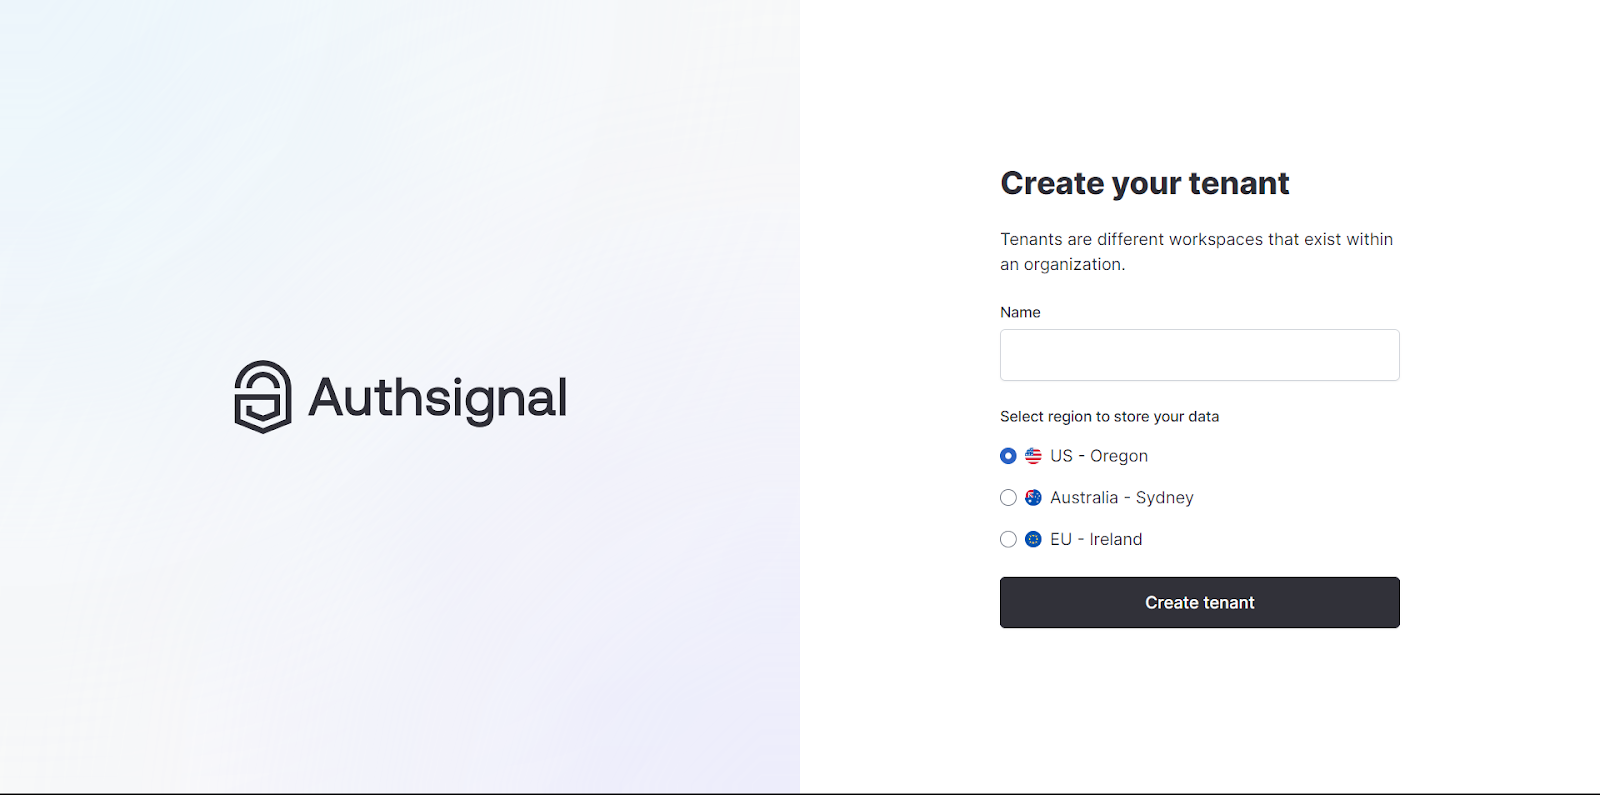
In the next step, create your first tenant. Choose any name for your tenant and select the data storage region.
Next, you need to configure the authenticators you want to use for your application. For example, I have enabled Email Magic Link and Authenticator App (TOTP).

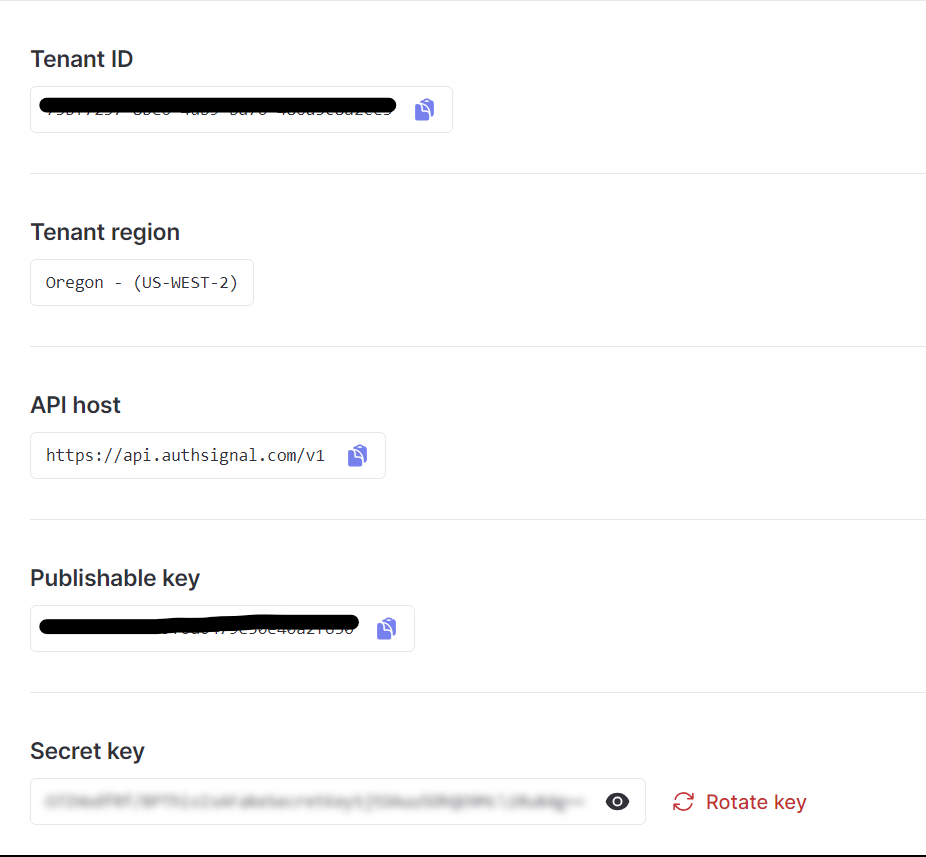
Once you have configured the authenticator, navigate to the API Keys option. Here, you will find your Secret Key, which will be necessary for implementing the authentication.
Application Flow
Let's understand the flow of the application:
Initial Visit
- The user visits the application's user interface. On the user interface, they see a login input box and a signup option. Since the user is new, they opt to sign up.
Signup Flow
Upon clicking the signup link, the user is directed to a page to enter their chosen username.
After entering the username and clicking the signup button, the front end triggers a POST API call to /api/signup, sending the username in the request body.
The backend receives the request and communicates with the Authsignal server for user authentication.
Authsignal prompts the user to set up Magic Link authentication by entering their email address.
Authsignal sends a magic link to the provided email address.
After clicking the magic link, the user is authenticated and redirected to the home page, where they receive a welcome message displaying their email address. The page also includes a logout button.
Login Flow
The user logs out and returns to the login page.
Here, the user enters their registered username and clicks the Login button.
Upon clicking Login, the front end triggers a POST API call to /api/login, passing the username in the request body.
The backend again communicates with Authsignal for user authentication, prompting the setup of Magic Link authentication.
The user is directed to a page to enter their email address.
Authsignal sends a magic link to the provided email address.
After clicking the magic link, the user is authenticated and redirected to the home page, greeted with a welcome message displaying their email address.
This flow ensures users can sign up using a chosen username, and set up Magic Link authentication via email for both signup and login. Here is a video tutorial to visually aid you in understanding the flow:
How to Set Up Your Backend Server
In this section, I will guide you through how to set up your Flask server for implementing Magic Link Authentication. Before we begin, it's recommended to set up a virtual environment to isolate your project's dependencies. Here's how you can do it:
Open your terminal or command prompt.
Navigate to your project's directory.
Run the following command to create a new virtual environment:
python -m venv myenv
Note: Replace myenv with the desired name for your virtual environment.
4. Activate the virtual environment using the appropriate command for your operating system:
- For Windows:
source myenv/Scripts/activate
- For macOS/Linux:
source myenv/bin/activate
Now that you have your virtual environment set up, let's install the necessary dependencies.
To begin, make sure you have Flask installed, which is a micro web framework for Python. You can install it using the following one-liner:
pip install Flask
Next, we need python-decouple, a library that helps manage configuration settings in separate files. Install it with the following command:
pip install python-decouple
The flask-cors library is a Flask extension that allows for Cross-Origin Resource Sharing (CORS) support in your Flask application.
pip install flask-cors
Finally, we need to install the Python SDK for Authsignal. You can install it with the following command:
pip install authsignal
Now that we have all the necessary dependencies installed, let's create a sample Flask server to get started with Magic Link Authentication. Here's a basic setup to help you get started:
from flask import Flask
from flask_cors import CORS

app = Flask(__name__)
CORS(app, supports_credentials=True)

@app.route("/")
def hello():
    return "Hello, world!"

if __name__ == "__main__":
    app.run(debug=True)
In the next steps, we will integrate AuthSignal and implement the Magic Link Authentication functionality into this server.
How to Set Up Environment Variables
To successfully configure and integrate AuthSignal into your Flask server, you need to set up the following environment variables:
AUTHSIGNAL_BASE_URL: This variable contains the base URL of the Authsignal server. It allows your server to communicate with Authsignal's authentication service.AUTHSIGNAL_SECRET_KEY: This variable contains the secret key associated with your Authsignal project. It is used for secure communication between your server and AuthSignal.SECRET_KEY: This variable is a random key used to encrypt the cookies and send them to the browser.
Setting environment variables instead of hardcoding in the code provides improved security by keeping sensitive information, such as API keys and secret keys, separate from the codebase. This reduces the risk of accidental exposure or unauthorized access to these credentials.
To set up these environment variables, you can follow these steps:
Open a terminal or command prompt.
Navigate to the directory where your Flask server is located.
Create a
.envfile and export the environment variables using the following commands:
export AUTHSIGNAL_BASE_URL=<base_url>
export AUTHSIGNAL_SECRET_KEY=<secret_key>
export SECRET_KEY=<random-secret-key>
Make sure to replace <base_url>, <secret_key>, and <random-secret-key> with the appropriate values for your Authsignal project. You can find the values for these environment variables in the API Keys section of the Authsignal dashboard as explained earlier.
Note: The method for setting environment variables can vary depending on your operating system. The above commands are applicable for Unix-based systems. For Windows, you can use the
setcommand instead ofexport.
To export the variables added in the .env file, you can use the following command in the terminal:
source .env
By properly setting these environment variables, your Flask server can securely communicate with Authsignal and implement the Magic Link Authentication functionality.
How to Initialize the Authsignal Client
To integrate Authsignal into your Flask server and implement Magic Link Authentication, you need to initialize the Authsignal client. Here's an example of how you can do this:
from flask import Flask
from flask_cors import CORS
import authsignal.client
from decouple import config

app = Flask(__name__)
CORS(app)

AUTHSIGNAL_BASE_URL = config("AUTHSIGNAL_BASE_URL")
AUTHSIGNAL_SECRET_KEY = config("AUTHSIGNAL_SECRET_KEY")
SECRET_KEY = config("SECRET_KEY")

authsignal_client = authsignal.Client(
    api_key=AUTHSIGNAL_SECRET_KEY,
    api_url=AUTHSIGNAL_BASE_URL
)
In this code snippet, we first import the authsignal.client, the Python SDK for Authsignal. We also import config from python-decouple to retrieve the environment variables.
We retrieve the environment variables AUTHSIGNAL_BASE_URL, AUTHSIGNAL_SECRET_KEY and SECRET_KEY using config from python-decouple.
Finally, we initialize the authsignal.Client by passing in the API key AUTHSIGNAL_SECRET_KEY and the base URL of the Authsignal server AUTHSIGNAL_BASE_URL.
By initializing the Authsignal client, we are ready to implement the Magic Link Authentication functionality in our Flask server.
Authsignal Actions
Authsignal allows you to create actions to track and manage user interactions in your application. Actions are events that can be triggered by users, such as signing up or logging in. By creating custom actions, you can have more control over the authentication process and implement specific authentication methods like Magic Link Authentication.
To create an action on your Authsignal dashboard, follow these steps:
Click on "Actions" in your Authsignal dashboard.
Click on "Configure a new action" to create a new action.
Enter a name for the action that describes its purpose or the user interaction it represents.
Next, you can configure the rule for the action. In our case, since we want to implement Magic Link Authentication, we will add a rule to challenge users with Email Magic Link. This will send a magic link to the user's email for authentication.
Save the action to apply the rule and make it active.
Here is a video demonstrating the process of creating an Authsignal action and configuring it for Magic Link Authentication:
You can create two actions – "signUp" and "signIn". In the next steps, we will make use of these actions.
How to Create the Required Routes
Finally, to implement the Magic Link Authentication, we need to create three routes: /api/signup, /api/login, /api/callback, and /api/user.
/api/signup Route
The /api/signup route is responsible for allowing the users to register in our application. Here's how we implement it:
@app.route('/api/signup', methods=['POST'])
def signup():
    username = request.json.get('username')
    if not username:
        return jsonify({'error': 'Missing username parameter'}), 400

    response = authsignal_client.track(
        user_id=username,
        action="signUp",
        payload={
            "user_id": username,
            "redirectUrl": "http://localhost:5000/api/callback"
        }
    )
    return jsonify(response), 200
In this implementation, the route expects a JSON payload containing the username parameter. It then uses the authsignal_client to track the user's signUp action and generate a Magic Link. The track method lets you record actions performed by users and initiate challenges. The redirectUrl specifies the URL where the user will be redirected after they have been authenticated. We will create this API next.
/api/callback Route
The /api/callback route handles the callback URL where the user is redirected after verifying themselves. Here's the implementation for this route:
@app.route('/api/callback', methods=['GET'])
def callback():
    token = request.args.get('token')
    challenge_response = authsignal_client.validate_challenge(token)

    if challenge_response["state"] == 'CHALLENGE_SUCCEEDED':
        encoded_token = jwt.encode(
            payload={"username": challenge_response["user_id"]},
            key=SECRET_KEY,
            algorithm="HS256"
        )
        response = redirect('http://localhost:3000/')
        response.set_cookie(
            key='auth-session',
            value=encoded_token,
            secure=False,
            path='/'
        )
        return response

    return redirect("/")
When the users are redirected, Authsignal adds the JWT token in the URL as a token query parameter.
In this implementation, the route retrieves the token parameter from the query string. It then uses the authsignal_client to validate the challenge and check if the authentication was successful.
If the authentication succeeds, we encode a JSON Web Token (JWT). The token payload includes the username obtained from the challenge response. It uses the SECRET_KEY and the HS256 algorithm for encryption.
Next, the user is redirected to the home page (http://localhost:3000/), and a auth-session cookie is set with the encoded token for further user identification.
Note that the token returned from Authsignal in the redirect is not intended to be used as a session token. It just contains information about the challenge so that we can determine if the challenge was successful.
/api/login Route
The /api/login route is responsible for allowing the users to log into the application. Here’s the implementation for the route:
@app.route('/api/login', methods=['POST'])
def login():
    username = request.json.get('username')
    if not username:
        return jsonify({'error': 'Missing username parameter'}), 400

    response = authsignal_client.track(
        user_id=username,
        action="signIn",
        payload={
            "user_id": username,
            "redirectUrl": "http://localhost:5000/api/callback"
        }
    )
    return jsonify(response), 200
The route is configured to handle POST requests on the /api/login endpoint. Upon receiving a POST request, the route first extracts the provided username from the JSON payload sent with the request. It ensures that the username is present. If not, it promptly returns a 400 error response indicating a missing username parameter.
Similar to the signup flow, it then uses the authsignal_client to track the user's signIn action and generate a Magic Link. The redirectUrl specifies the URL where the user will be redirected after they have been authenticated.
/api/user Route
The /api/user route is responsible for retrieving user information. Here's the implementation for this route:
@app.route("/api/user", methods=['GET'])
def user():
    token = request.cookies.get('auth-session')
    decoded_token = jwt.decode(token, SECRET_KEY, algorithms=["HS256"])
    username = decoded_token.get('username')
    response = authsignal_client.get_user(user_id=username)
    return jsonify({"username": username, "email": response["email"]}), 200
In this implementation, the GET endpoint starts by extracting the auth-session cookie from the incoming request. Then it decodes the JWT using the jwt.decode method, utilizing the SECRET_KEY as the secret key for decoding.
The decoded token provides the username of the user. It then uses the authsignal_client to retrieve user information based on the provided userId. It then returns a JSON response with the username and email information.
By implementing these routes, we will be able to handle the basic authentication process and retrieve user information in our Flask server.
How to Set Up a New Frontend React Project
Let's set up our front-end project in this section. This will also include setting up routing in the application.
Start by initializing a new React project using create-react-app or any preferred method (like Vite, for example, which is a more modern way to set up a React app). This command sets up the basic structure for your React application.
npx create-react-app magic-link-auth
cd magic-link-auth
Once the project is created and you're inside the project directory, install the required dependencies. Here, we need react-router-dom for handling routing and bootstrap for easy styling.
npm install react-router-dom bootstrap
Import Bootstrap CSS
Bootstrap provides pre-styled components and utilities for easier and faster styling of your application.
In the index.js file, import Bootstrap:
import React from 'react';
import ReactDOM from 'react-dom/client';
import App from './App';
import reportWebVitals from './reportWebVitals';
import "bootstrap/dist/css/bootstrap.min.css"; // Import Bootstrap CSS

const root = ReactDOM.createRoot(document.getElementById('root'));
root.render(
  <React.StrictMode>
    <App />
  </React.StrictMode>
);

// If you want to start measuring performance in your app, pass a function
// to log results (for example: reportWebVitals(console.log))
// or send to an analytics endpoint. Learn more: https://bit.ly/CRA-vitals
reportWebVitals();
Additionally, we will write some custom CSS. Replace the code in the index.css file with the following code:
html,
body {
  padding: 0;
  margin: 0;
  font-family: -apple-system, BlinkMacSystemFont, Segoe UI, Roboto, Oxygen,
    Ubuntu, Cantarell, Fira Sans, Droid Sans, Helvetica Neue, sans-serif;
}

* {
  box-sizing: border-box;
}

main {
  padding: 5rem 0;
  flex: 1;
  display: flex;
  flex-direction: column;
  justify-content: center;
  align-items: center;
}

code {
  background: #fafafa;
  border-radius: 5px;
  padding: 0.75rem;
  font-family: Menlo, Monaco, Lucida Console, Courier New, monospace;
}

input[type="button"] {
  border: none;
  background: cornflowerblue;
  color: white;
  padding: 12px 24px;
  margin: 8px;
  font-size: 18px;
  border-radius: 8px;
  cursor: pointer;
}
Similarly, replace the code in the App.css with the following code:
.mainContainer {
  flex-direction: column;
  display: flex;
  align-items: center;
  justify-content: center;
  height: 100vh;
}

.titleContainer {
  display: flex;
  flex-direction: column;
  font-size: 48px;
  font-weight: bolder;
  align-items: center;
  justify-content: center;
}

.resultContainer,
.historyItem {
  flex-direction: row;
  display: flex;
  width: 400px;
  align-items: center;
  justify-content: space-between;
}

.historyContainer {
  flex-direction: column;
  display: flex;
  height: 200px;
  align-items: center;
  flex-grow: 5;
  justify-content: flex-start;
}

.buttonContainer {
  display: flex;
  flex-direction: column;
  align-items: center;
  justify-content: center;
  height: 260px;
}

.inputContainer {
  display: flex;
  flex-direction: column;
  align-items: flex-start;
  justify-content: center;
}

.inputContainer>.errorLabel {
  color: red;
  font-size: 16px;
  text-align: center;
}

.inputBox {
  height: 48px;
  width: 400px;
  font-size: medium;
  border-radius: 8px;
  border: 1px solid grey;
  padding-left: 8px;
}

.inputButton {
  height: 48px;
  width: 400px;
}
Set Up Routing
Routing in React applications helps navigate between different views or pages. react-router-dom simplifies this process.
In your App.js file, configure the routing:
import React from "react";
import { BrowserRouter, Routes, Route } from "react-router-dom";
import Dashboard from "./pages/Dashboard";
import Register from "./pages/Register";
import Login from "./pages/Login";
import "./App.css";
import "./index.css";

const App = () => {
  return (
    <BrowserRouter>
      <Routes>
        <Route path="/" element={<Dashboard />} />
        <Route path="/login" element={<Login />} />
        <Route path="/signup" element={<Register />} />
      </Routes>
    </BrowserRouter>
  );
};

export default App;
It defines an App component that encapsulates the entire application structure within a <BrowserRouter> component. Inside <Routes>, we define three <Route> components: one for the root path / rendering the Dashboard component, and two for the /login and /signup paths, rendering the Login and Register components respectively.
This setup enables navigation between different views based on URL paths, allowing users to access specific components when they visit corresponding routes within the application.
In the upcoming sections, we will set up the above-mentioned three components.
How to Set Up the Components
In the previous section, we imported two components from the src/pages folder. Let's create a pages folder inside the src folder, and then we can start creating the components.
Register Component
Let’s create a Register.jsx file inside the pages folder. The Register component allows users to register within our application.
import React, { useState, useEffect } from "react";
import { useNavigate, Link } from "react-router-dom";

const Register = () => {
  const [username, setUsername] = useState("");
  const [usernameError, setUsernameError] = useState("");

  const navigate = useNavigate();

  useEffect(() => {
    const isAuthenticated = checkCookies();
    if (isAuthenticated) {
      navigate("/");
    }
  }, [navigate]);

  const checkCookies = () => {
    const authSessionCookie = document.cookie.match("auth-session=([^;]+)");

    return !!authSessionCookie;
  };

  const onButtonClick = () => {
    setUsernameError("");

    if ("" === username) {
      setUsernameError("Username is mandatory!");
      return;
    }

    signup();
  };

  const signup = async () => {
    const response = await fetch("http://localhost:5000/api/login", {
      method: "POST",
      headers: {
        "Content-Type": "application/json",
      },
      body: JSON.stringify({
        username,
      }),
      credentials: "include",
    });

    const { url } = await response.json();

    // Redirect to verification URL
    window.location.href = url;
  };

  return (
    <div className={"mainContainer"}>
      <div className={"titleContainer"}>
        <div>Sign Up</div>
      </div>
      <br />
      <div className={"inputContainer"}>
        <input
          value={username}
          placeholder="Enter your username"
          onChange={(e) => setUsername(e.target.value)}
          className={"inputBox"}
        />
        <label className="errorLabel text-center">{usernameError}</label>
      </div>
      <br />
      <div className={"inputContainer"}>
        <input
          className={"inputButton"}
          type="button"
          onClick={onButtonClick}
          value={"Sign Up"}
        />
      </div>
      <div>
        Existing User? <Link to="/login">Login here</Link>
      </div>
    </div>
  );
};

export default Register;
The component initializes state variables using useState to manage the visibility of the usernameError and store the username input in userName. It also initializes the navigate function from useNavigate to handle navigation within the application.
We use the useEffect hook to check for authentication cookies when the component mounts. It calls the checkCookies function, which checks for the existence of cookies that we had set from the backend server. If auth-session cookie is found, the user is automatically redirected to the root URL using navigate("/").
Clicking the “Sign Up” button triggers the onButtonClick function. It first checks whether the user has entered the username. If not, it shows an error message using the usernameError. If the user has entered the username, it calls the signup function.
The signup performs an asynchronous POST request to the /api/signup endpoint with the provided username. Upon successful response, it redirects the user to the received verification URL by changing window.location.href.
The JSX returned by the component defines the UI layout that looks like the below:
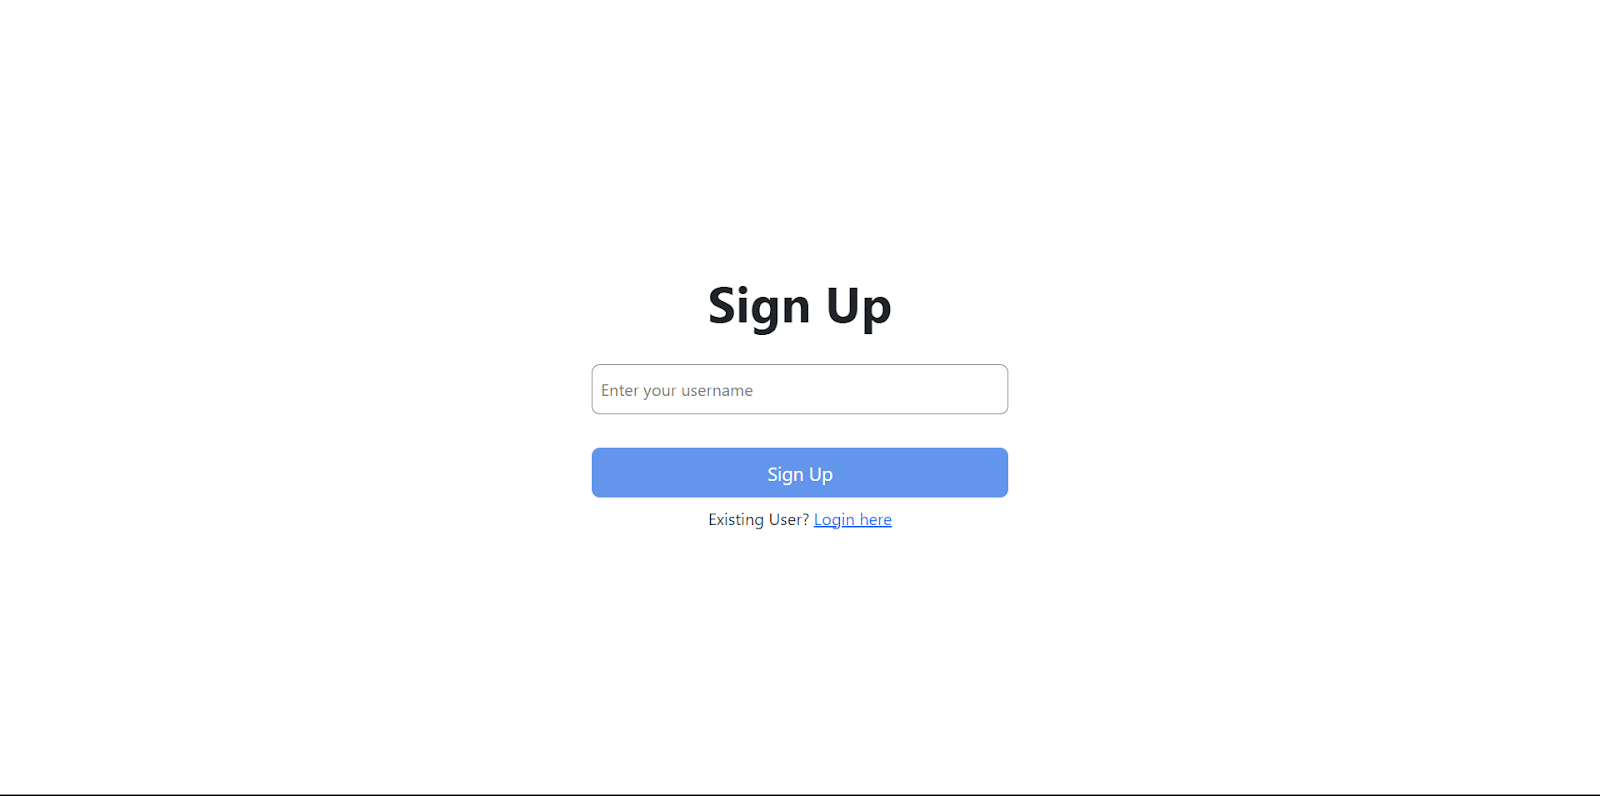
It includes an input field for the users to enter their username and a "Sign Up" button. Below the button, we have a link to the Login page for the existing users to log in.
Login Component
We have kept the login page similar to the signup page for simplicity. Hence, the Login component is pretty much the same as the Register component.
import React, { useState, useEffect } from "react";
import { useNavigate, Link } from "react-router-dom";

const Login = () => {
  const [username, setUsername] = useState("");
  const [usernameError, setUsernameError] = useState("");

  const navigate = useNavigate();

  useEffect(() => {
    const isAuthenticated = checkCookies();
    if (isAuthenticated) {
      navigate("/");
    }
  }, [navigate]);

  const checkCookies = () => {
    const authSessionCookie = document.cookie.match("auth-session=([^;]+)");

    return !!authSessionCookie;
  };

  const onButtonClick = () => {
    setUsernameError("");

    if ("" === username) {
      setUsernameError("Username is mandatory!");
      return;
    }

    login();
  };

  const login = async () => {
    const response = await fetch("http://localhost:5000/api/login", {
      method: "POST",
      headers: {
        "Content-Type": "application/json",
      },
      body: JSON.stringify({
        username,
      }),
      credentials: "include",
    });

    const { url } = await response.json();

    // Redirect to verification URL
    window.location.href = url;
  };

  return (
    <div className={"mainContainer"}>
      <div className={"titleContainer"}>
        <div>Login</div>
      </div>
      <br />
      <div className={"inputContainer"}>
        <input
          value={username}
          placeholder="Enter your username"
          onChange={(ev) => setUsername(ev.target.value)}
          className={"inputBox"}
        />
        <label className="errorLabel text-center">{usernameError}</label>
      </div>
      <br />
      <div className={"inputContainer"}>
        <input
          className={"inputButton"}
          type="button"
          onClick={onButtonClick}
          value={"Log in"}
        />
      </div>
      <div>
        New User? <Link to="/signup">Sign up here</Link>
      </div>
    </div>
  );
};

export default Login;
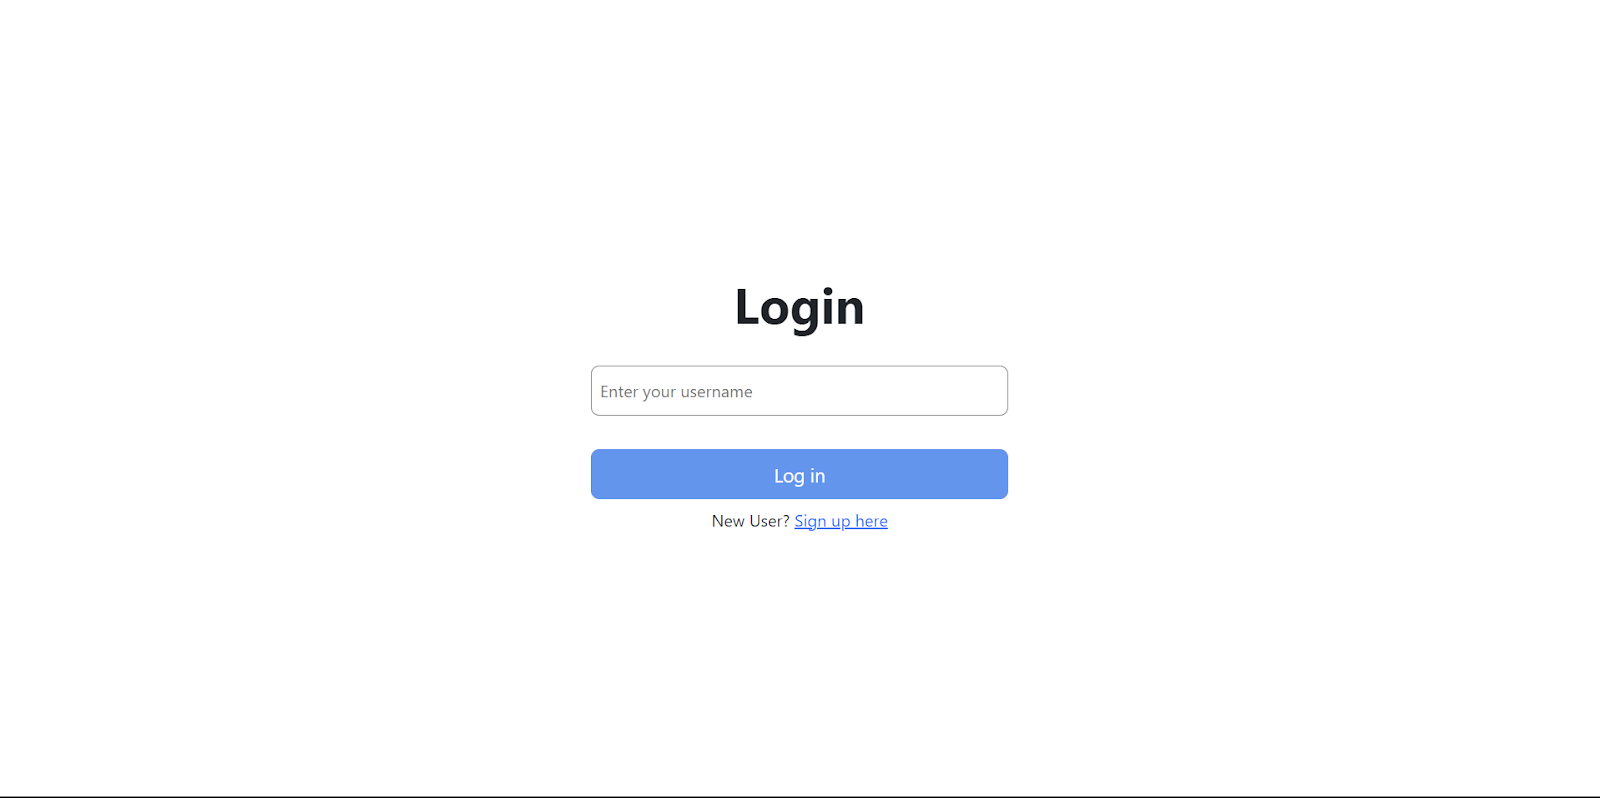
The only significant difference other than the text and button in the UI here is that we will be making the API call to the /api/login route when the users hit the Login button.
The UI looks like below:
Dashboard Component
The Dashboard component in our application serves as the interface for authenticated users, displaying a welcome message with the user’s email and enabling user logout functionality.
Let’s create a Dashboard.jsx file inside the pages folder.
import React, { useState, useEffect } from "react";
import { useNavigate } from "react-router-dom";

const Dashboard = () => {
  const [userEmail, setUserEmail] = useState("");
  const navigate = useNavigate();

  useEffect(() => {
    const checkCookies = async () => {
      const authSessionCookie = document.cookie.match("auth-session=([^;]+)");

      if (!authSessionCookie) {
        navigate("/auth");
        return false;
      }

      return true;
    };

    const fetchData = async () => {
      const cookiesValid = await checkCookies();
      if (!cookiesValid) return;

      try {
        const response = await fetch("http://localhost:5000/api/user", {
          method: "GET",
          headers: {
            "Content-Type": "application/json",
          },
          credentials: "include"
        });

        if (!response.ok) {
          throw new Error("Failed to fetch user data");
        }

        const data = await response.json();
        setUserEmail(data.email);
      } catch (error) {
        navigate("/auth");
      }
    };

    fetchData();
  }, [navigate]);

  const handleLogout = () => {
    document.cookie = `auth-session=; max-age=0`;
    navigate("/auth");
  };

  return (
    <div className="d-flex justify-content-center align-items-center vh-100">
      <main className="px-3 text-center">
        <h1>Welcome Home!</h1>
        <p className="lead">You're logged in as {userEmail}!</p>
        <div className="d-flex justify-content-center">
          <button
            className="btn btn-lg btn-dark fw-bold border-white bg-dark"
            onClick={handleLogout}
          >
            Log Out
          </button>
        </div>
      </main>
    </div>
  );
};

export default Dashboard;
Upon component mounting or when navigate changes (a dependency of useEffect), the effect runs. It begins by defining two asynchronous functions. The first, checkCookies, verifies the presence of auth-session cookies. If it is missing, it redirects the user to the authentication route.
The second function, fetchData, is responsible for fetching user data. It checks the validity of cookies using checkCookies. Upon verification, it sends a GET request to our back-end API endpoint. Upon successful response, it updates the userEmail state with the user's email fetched from the API data.
If any error occurs during this process, such as failing to fetch user data, it redirects the user back to the authentication route.
The JSX returned by the component renders a simple dashboard layout.
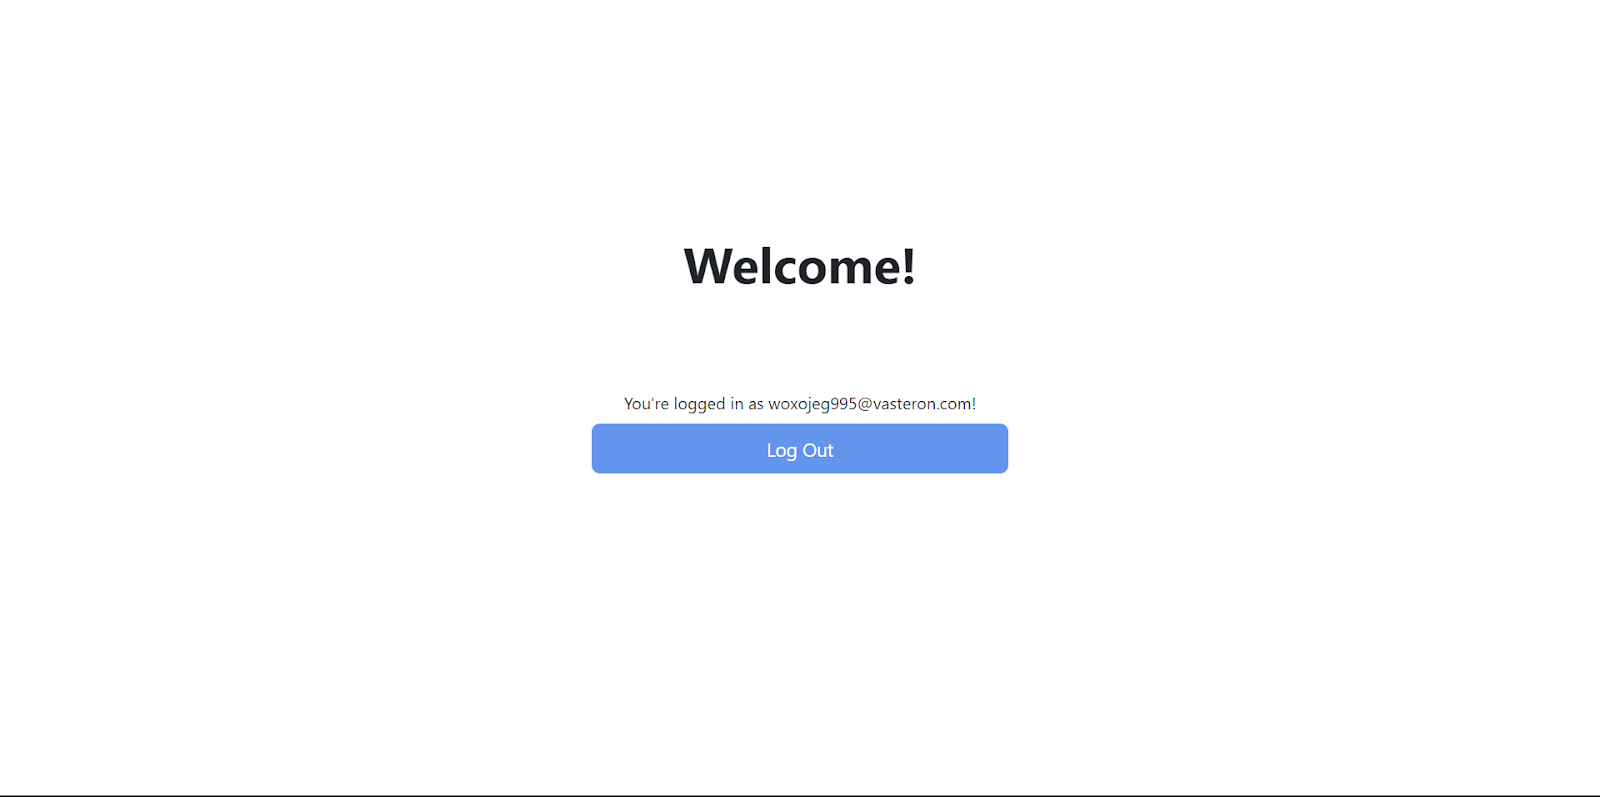
The displayed content includes a welcoming message and the currently logged-in user's email. There's also a "Log Out" button which, upon clicking, initiates the logout process by triggering the handleLogout function. It removes the auth-session cookies by setting their max-age to 0, effectively expiring them. Afterward, it redirects the user to the authentication route.
How to Run the Application
You can find the code of the final application in this GitHub repository.
To run your backend application, run python app.py from your back-end folder in your terminal. This will start your back-end server on port 5000. Next, run the frontend application using the npm start command. This will start your frontend application on the port 3000.
Wrapping Up
In this tutorial, you learned how to use Authsignal to implement basic user authentication with email verification through magic links.
Authsignal makes handling users and keeping things safe easier, letting developers focus on improving apps. It also removes the overhead of remembering another password for the users of the application.
To learn more about Authsignal, visit the Authsignal documentation.
Should you have any issues or questions related to the tutorial, then feel free to reach out to me on Twitter.